Spring事件监听示例及相关源码解析
Spring 事件监听示例 Spring事件体系包括三个组件:事件 ,事件监听器 ,事件广播器
事件广播器 1 2 3 4 5 6 7 8 9 10 11 12 13 14 15 16 17 18 @Service public class UserService { @Autowired ApplicationContext applicationContext; public void register (UserBean user) { applicationContext.publishEvent(new UserRegisterEvent (user)); } }
事件广播的核心即为ApplicationContext.publishEvent()
事件
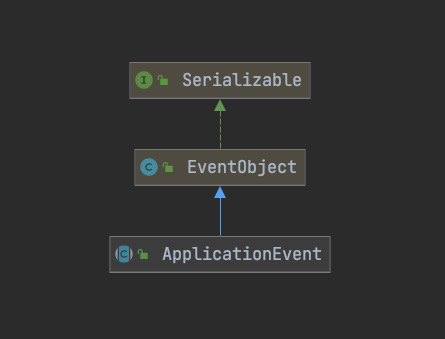
自定义事件,事件类需要继承ApplicationEvent
1 2 3 4 5 6 7 8 9 10 11 12 13 14 15 16 17 @Getter @Setter public class UserRegisterEvent extends ApplicationEvent { private static final long serialVersionUID = -2091700243904842639L ; public UserRegisterEvent (UserBean userBean) { super (userBean); } }
事件监听器 事件监听器用于监听事件,并在监听到事件后执行相印操作。实现可分为基于注解和基于接口
基于接口 1. ApplicationListener 1 2 3 4 5 6 7 8 public interface ApplicationListener <E extends ApplicationEvent > extends EventListener { void onApplicationEvent (E event) ; }
在实现ApplicationListener接口时需要将监听事件 作为泛型传递,监听实现代码如下所示:
1 2 3 4 5 6 7 8 9 10 11 12 @Component @Order(0) public class RegisterListener implements ApplicationListener <UserRegisterEvent> { @Override public void onApplicationEvent (UserRegisterEvent userRegisterEvent) { UserBean user = (UserBean) userRegisterEvent.getSource(); System.out.println("注册信息,用户名:" +user.getName()+",密码:" +user.getPassword()); } }
1 2 3 4 5 6 7 8 9 10 11 @Component @Order(1) public class RegisterEmailListener implements ApplicationListener <UserRegisterEvent> { @Override public void onApplicationEvent (UserRegisterEvent userRegisterEvent) { System.out.println("用户注册成功,发送邮件。" ); } }
2.SmartApplicationListener 实现ApplicationListener接口时可以使用@Order实现有序监听,但同时也可以使用实现SmartApplicationListener实现有序监听。
1 2 3 4 5 6 7 8 9 10 11 12 13 14 15 16 17 18 19 20 21 22 23 24 25 26 27 28 29 30 31 32 33 34 35 36 @Component public class RegisterListener implements SmartApplicationListener { @Override public boolean supportsEventType (Class<? extends ApplicationEvent> aClass) { return aClass == UserRegisterEvent.class; } @Override public boolean supportsSourceType (Class<?> aClass) { return aClass == UserBean.class; } @Override @Async public void onApplicationEvent (ApplicationEvent applicationEvent) { UserRegisterEvent userRegisterEvent = (UserRegisterEvent) applicationEvent; UserBean user = (UserBean) userRegisterEvent.getSource(); try { Thread.sleep(10000 ); } catch (Exception ignored) {} System.out.println("注册信息,用户名:" +user.getName()+",密码:" +user.getPassword()); } @Override public int getOrder () { return 0 ; }
1 2 3 4 5 6 7 8 9 10 11 12 13 14 15 16 17 18 19 20 21 22 23 24 25 26 27 28 29 30 31 @Component public class RegisterEmailListener implements SmartApplicationListener { @Override public boolean supportsEventType (Class<? extends ApplicationEvent> aClass) { return aClass == UserRegisterEvent.class; } @Override public boolean supportsSourceType (Class<?> aClass) { return aClass == UserBean.class; } @Override @Async public void onApplicationEvent (ApplicationEvent applicationEvent) { UserRegisterEvent userRegisterEvent = (UserRegisterEvent) applicationEvent; UserBean user = (UserBean) userRegisterEvent.getSource(); System.out.println("用户:" +user.getName()+",注册成功,发送邮件通知。" ); } @Override public int getOrder () { return 1 ; } }
SmartApplicationListener1接口添加了两个方法supportsEventType、supportsSourceType来作为区分是否是我们监听的事件,只有这两个方法同时返回true时才会执行onApplicationEvent方法。
可以看到除了上面的方法,还提供了一个getOrder方法,这个方法就可以解决执行监听的顺序问题,return的数值越小证明优先级越高,执行顺序越靠前。
基于注解 @EventListener实现监听
1 2 3 4 5 6 7 8 9 10 11 12 13 14 15 16 17 18 19 20 21 22 23 24 25 @Component public class AnnotationRegisterListener { @EventListener @Order(1) public void register (UserRegisterEvent userRegisterEvent) { UserBean user = (UserBean) userRegisterEvent.getSource(); try { Thread.sleep(10000 ); } catch (Exception ignored) {} System.out.println("@EventListener注册信息,用户名:" +user.getName()+",密码:" +user.getPassword()); } }
异步事件监听
上文提到,一般情况下,事件监听器都是同步执行的,当在业务逻辑中使用applicationContext.publishEvent发送事件广播之后,只有当所有事件监听执行完成之后具体业务方法才会完成。如果说我们不希望在执行监听时等待监听业务逻辑耗时,发布监听后立即要对接口或者界面做出反映,我们该怎么做呢?
1. 使用@Async实现异步监听 @Aysnc其实是Spring内的一个组件,可以完成对类内单个或者多个方法实现异步调用,这样可以大大的节省等待耗时。内部实现机制是线程池任务ThreadPoolTaskExecutor,通过线程池来对配置@Async的方法或者类做出执行动作。
线程任务池配置
我们创建一个ListenerAsyncConfiguration,并且使用@EnableAsync注解开启支持异步处理,具体代码如下所示:
1 2 3 4 5 6 7 8 9 10 11 12 13 14 15 16 17 18 19 20 21 22 23 24 25 @Configuration @EnableAsync public class ListenerAsyncConfiguration implements AsyncConfigurer { @Override public Executor getAsyncExecutor () { ThreadPoolTaskExecutor taskExecutor = new ThreadPoolTaskExecutor (); taskExecutor.setCorePoolSize(5 ); taskExecutor.setMaxPoolSize(10 ); taskExecutor.setQueueCapacity(25 ); taskExecutor.initialize(); return taskExecutor; } @Override public AsyncUncaughtExceptionHandler getAsyncUncaughtExceptionHandler () { return null ; } }
我们自定义的监听异步配置类实现了AsyncConfigurer接口并且实现getAsyncExecutor方法以提供线程任务池对象的获取。@Async注解就可以实现方法的异步调用
1 2 3 4 5 6 7 8 9 10 11 12 13 14 15 16 17 18 19 20 21 22 23 24 25 26 27 28 29 30 31 32 33 34 35 @Override @Async public void onApplicationEvent (ApplicationEvent applicationEvent) { UserRegisterEvent userRegisterEvent = (UserRegisterEvent) applicationEvent; UserBean user = (UserBean) userRegisterEvent.getSource(); try { Thread.sleep(10000 ); } catch (Exception ignored) {} System.out.println("注册信息,用户名:" +user.getName()+",密码:" +user.getPassword()); } @EventListener @Async public void register (UserRegisterEvent userRegisterEvent) { UserBean user = (UserBean) userRegisterEvent.getSource(); try { Thread.sleep(10000 ); } catch (Exception ignored) {} System.out.println("@EventListener注册信息,用户名:" +user.getName()+",密码:" +user.getPassword()); }
2.ApplicationEventMulticaster
阅读源码之后,发现可以通过自己实现ApplicationEventMulticaster接口,并在Spring容器中注册id为applicationEventMulticaster的Bean , 设置 executor 实现异步监听。
1 2 3 4 5 6 7 8 9 10 11 12 13 14 15 @Configuration public class MulticasterConfig { @Bean(name = "applicationEventMulticaster") public ApplicationEventMulticaster multicaster () { SimpleApplicationEventMulticaster simpleApplicationEventMulticaster = new SimpleApplicationEventMulticaster (); simpleApplicationEventMulticaster.setTaskExecutor(new SimpleAsyncTaskExecutor ()); return simpleApplicationEventMulticaster ; } }
源码解析 事件发布者
事件发布者 ApplicationEventMulticaster(多播器)
AnnotationConfigApplicationContext#publishEvent(ApplicationEvent event)将事件发送给了ApplicationEventMulticaster, ApplicationEventMulticaster注册着所有的Listener,然后根据事件类型决定转发给那个Listener。
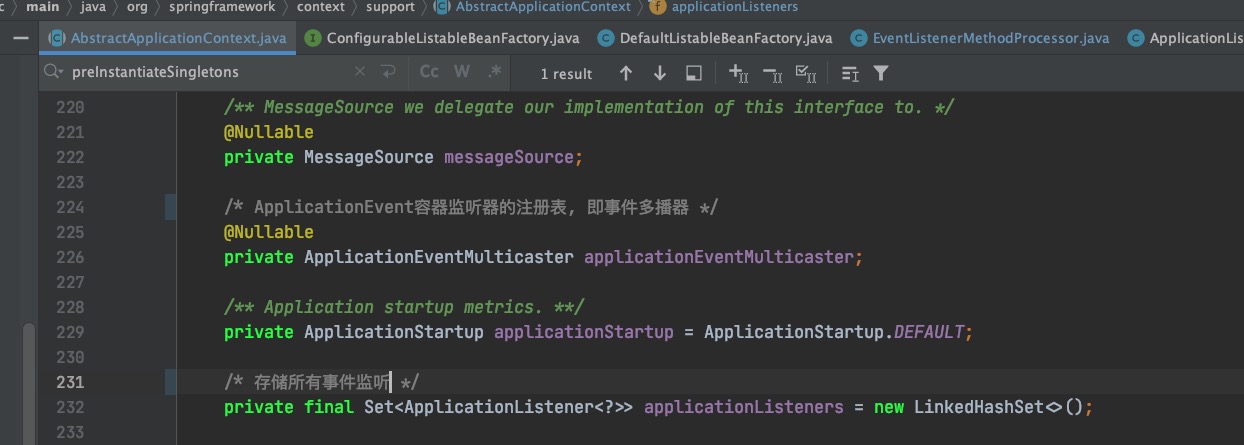
Spring在ApplicationContext接口的抽象实现类AbstractApplicationContext中完成了事件体系的搭建。AbstractApplicationContext拥有一个applicationEventMulticaster成员变量,applicationEventMulticaster提供了容器监听器的注册表。
阅读顺序
refresh() —–> 直接看 initApplicationEventMulticaster() ———–> registerListeners() ———> finishRefresh() 进入 —-> publishEvent(new ContextRefreshedEvent(this))
初始化事件多播器 initApplicationEventMulticaster() 1 2 3 4 5 6 7 8 9 10 11 12 13 14 15 16 17 18 19 20 21 22 protected void initApplicationEventMulticaster () { ConfigurableListableBeanFactory beanFactory = getBeanFactory(); if (beanFactory.containsLocalBean(APPLICATION_EVENT_MULTICASTER_BEAN_NAME)) { this .applicationEventMulticaster = beanFactory.getBean(APPLICATION_EVENT_MULTICASTER_BEAN_NAME, ApplicationEventMulticaster.class); if (logger.isTraceEnabled()) { logger.trace("Using ApplicationEventMulticaster [" + this .applicationEventMulticaster + "]" ); } } else { this .applicationEventMulticaster = new SimpleApplicationEventMulticaster (beanFactory); beanFactory.registerSingleton(APPLICATION_EVENT_MULTICASTER_BEAN_NAME, this .applicationEventMulticaster); if (logger.isTraceEnabled()) { logger.trace("No '" + APPLICATION_EVENT_MULTICASTER_BEAN_NAME + "' bean, using " + "[" + this .applicationEventMulticaster.getClass().getSimpleName() + "]" ); } } }
注册事件到多播器中 registerListeners() 1 2 3 4 5 6 7 8 9 10 11 12 13 14 15 16 17 18 19 20 21 22 protected void registerListeners () { for (ApplicationListener<?> listener : getApplicationListeners()) { getApplicationEventMulticaster().addApplicationListener(listener); } String[] listenerBeanNames = getBeanNamesForType(ApplicationListener.class, true , false ); for (String listenerBeanName : listenerBeanNames) { getApplicationEventMulticaster().addApplicationListenerBean(listenerBeanName); } Set<ApplicationEvent> earlyEventsToProcess = this .earlyApplicationEvents; this .earlyApplicationEvents = null ; if (!CollectionUtils.isEmpty(earlyEventsToProcess)) { for (ApplicationEvent earlyEvent : earlyEventsToProcess) { getApplicationEventMulticaster().multicastEvent(earlyEvent); } } }
事件发布publishEvent
实际调用AbstractApplicationContext中的publishEvent方法
1 2 3 4 5 6 7 8 9 10 11 12 13 14 15 16 17 18 19 20 21 22 23 24 25 26 27 28 29 30 31 32 33 34 protected void publishEvent (Object event, @Nullable ResolvableType eventType) { Assert.notNull(event, "Event must not be null" ); ApplicationEvent applicationEvent; if (event instanceof ApplicationEvent) { applicationEvent = (ApplicationEvent) event; } else { applicationEvent = new PayloadApplicationEvent <>(this , event); if (eventType == null ) { eventType = ((PayloadApplicationEvent<?>) applicationEvent).getResolvableType(); } } if (this .earlyApplicationEvents != null ) { this .earlyApplicationEvents.add(applicationEvent); } else { getApplicationEventMulticaster().multicastEvent(applicationEvent, eventType); } if (this .parent != null ) { if (this .parent instanceof AbstractApplicationContext) { ((AbstractApplicationContext) this .parent).publishEvent(event, eventType); } else { this .parent.publishEvent(event); } } }
进入SimpleApplicationEventMulticaster#multicastEvent
1 2 3 4 5 6 7 8 9 10 11 12 13 14 15 16 17 18 19 20 21 22 23 24 25 26 27 28 29 30 31 32 33 34 35 36 37 38 39 40 41 public void multicastEvent (final ApplicationEvent event, @Nullable ResolvableType eventType) { ResolvableType type = (eventType != null ? eventType : resolveDefaultEventType(event)); Executor executor = getTaskExecutor(); for (ApplicationListener<?> listener : getApplicationListeners(event, type)) { if (executor != null ) { executor.execute(() -> invokeListener(listener, event)); } else { invokeListener(listener, event); } } } protected void invokeListener (ApplicationListener<?> listener, ApplicationEvent event) { ErrorHandler errorHandler = getErrorHandler(); if (errorHandler != null ) { try { doInvokeListener(listener, event); } catch (Throwable err) { errorHandler.handleError(err); } } else { doInvokeListener(listener, event); } } private void doInvokeListener (ApplicationListener listener, ApplicationEvent event) { try { listener.onApplicationEvent(event); } catch (ClassCastException ex) { }
@EventListener 解析源码
Spring容器在启动的时候初始化EventListenerMethodProcessor和DefaultEventListenerFactory,用于处理@EventListener注解, 调用EventListenerMethodProcessor的afterSingletonsInstantiated方法。
1 2 3 4 5 6 7 8 9 10 11 12 13 if (!registry.containsBeanDefinition(EVENT_LISTENER_PROCESSOR_BEAN_NAME)) { RootBeanDefinition def = new RootBeanDefinition (EventListenerMethodProcessor.class); def.setSource(source); beanDefs.add(registerPostProcessor(registry, def, EVENT_LISTENER_PROCESSOR_BEAN_NAME)); } if (!registry.containsBeanDefinition(EVENT_LISTENER_FACTORY_BEAN_NAME)) { RootBeanDefinition def = new RootBeanDefinition (DefaultEventListenerFactory.class); def.setSource(source); beanDefs.add(registerPostProcessor(registry, def, EVENT_LISTENER_FACTORY_BEAN_NAME)); }
一个是注册一个用于解析@EventListener注解的EventListenerMethodProcessor ,一个是注册事件监听工厂。
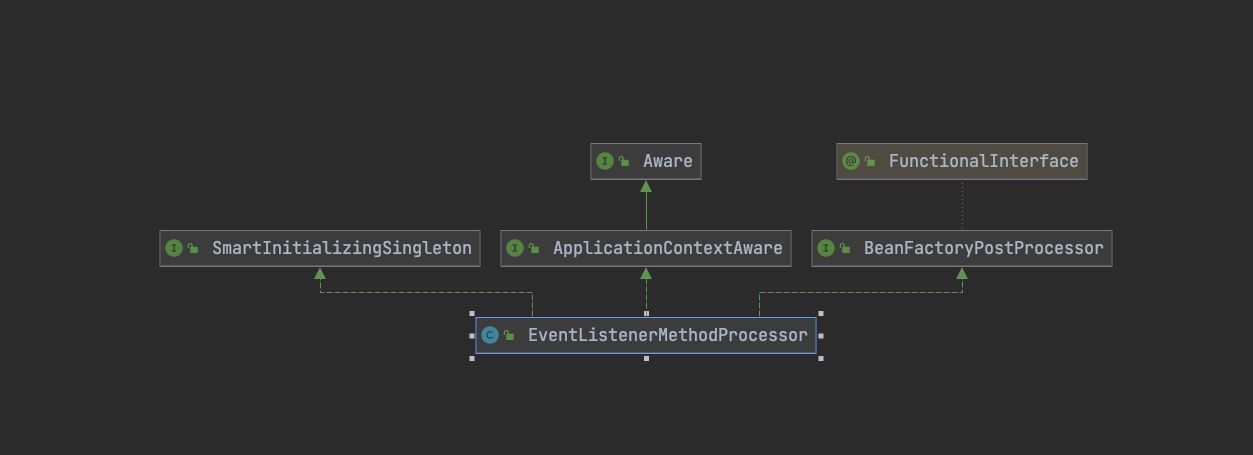
EventListenerMethodProcessor EventListenerMethodProcessor的类继承结构
EventListenerMethodProcessor 实现了 EventListenerMethodProcessor,所以执行 BeanFactory 后置处理器时,会调用postProcessBeanFactory(),将 DefaultEventListenerFactory 添加到缓存中。
可以看到EventListenerMethodProcessor实现了SmartInitializingSingleton接口 , 那肯定要重写 afterSingletonsInstantiated方法。
SmartInitializingSingleton接口是在所有的Bean实例化完成以后,Spring回调的方法。 获取所有的BeanFactory,找到其中标注了 @EventListener 的方法,利用反射和 DefaultEventListenerFactory为其创建 ApplicationListener
EventListenerMethodProcessor#afterSingletonsInstantiated
1 2 3 4 5 6 7 8 9 10 11 12 13 14 15 16 17 18 19 20 21 22 23 24 25 26 27 28 29 30 31 32 33 34 35 36 37 38 39 40 41 42 43 44 45 46 47 48 49 50 51 52 53 54 55 56 57 58 59 60 61 62 63 64 65 66 67 @Override public void afterSingletonsInstantiated () { ConfigurableListableBeanFactory beanFactory = this .beanFactory; Assert.state(this .beanFactory != null , "No ConfigurableListableBeanFactory set" ); String[] beanNames = beanFactory.getBeanNamesForType(Object.class); for (String beanName : beanNames) { ........ processBean(factories, beanName, type); ......... } } } private void processBean (final String beanName, final Class<?> targetType) { if (!this .nonAnnotatedClasses.contains(targetType) && AnnotationUtils.isCandidateClass(targetType, EventListener.class) && !isSpringContainerClass(targetType)) { Map<Method, EventListener> annotatedMethods = null ; try { annotatedMethods = MethodIntrospector.selectMethods(targetType, (MethodIntrospector.MetadataLookup<EventListener>) method -> AnnotatedElementUtils.findMergedAnnotation(method, EventListener.class)); } catch () {} if (CollectionUtils.isEmpty(annotatedMethods)) { this .nonAnnotatedClasses.add(targetType); if (logger.isTraceEnabled()) { logger.trace("No @EventListener annotations found on bean class: " + targetType.getName()); } } else { ConfigurableApplicationContext context = this .applicationContext; Assert.state(context != null , "No ApplicationContext set" ); List<EventListenerFactory> factories = this .eventListenerFactories; Assert.state(factories != null , "EventListenerFactory List not initialized" ); for (Method method : annotatedMethods.keySet()) { for (EventListenerFactory factory : factories) { if (factory.supportsMethod(method)) { Method methodToUse = AopUtils.selectInvocableMethod(method, context.getType(beanName)); ApplicationListener<?> applicationListener = factory.createApplicationListener(beanName, targetType, methodToUse); if (applicationListener instanceof ApplicationListenerMethodAdapter) { ((ApplicationListenerMethodAdapter) applicationListener).init(context, this .evaluator); } context.addApplicationListener(applicationListener); break ; } } } if (logger.isDebugEnabled()) { logger.debug(annotatedMethods.size() + " @EventListener methods processed on bean '" + beanName + "': " + annotatedMethods); } } } }
可以看到,对于有EventListener注解的方法,spring会实例化ApplicationListenerMethodAdapter。并向AbstractApplicationContext.applicationListeners中注册该listener。
发布事件 基于@EventListener注解的,发布事件流程和基于接口的一样,唯一的区别在于走到 listener.onApplicationEvent(event) ,基于注解的会走到 ApplicationListenerMethodAdapter实现类中 onApplicationEvent方法,基于注解的是反射调用,而基于接口的形式是直接调用实现类的onApplicationEvent
1 2 3 4 5 6 7 8 9 10 11 12 13 14 15 16 17 18 19 20 21 22 23 24 25 26 27 28 29 30 31 @Override public void onApplicationEvent (ApplicationEvent event) { processEvent(event); } public void processEvent (ApplicationEvent event) { Object[] args = resolveArguments(event); if (shouldHandle(event, args)) { Object result = doInvoke(args); if (result != null ) { handleResult(result); } else { logger.trace("No result object given - no result to handle" ); } } } protected Object doInvoke (Object... args) { Object bean = getTargetBean(); if (bean.equals(null )) { return null ; } ReflectionUtils.makeAccessible(this .method); try { return this .method.invoke(bean, args); } catch (){} }
@Order/Orderd实现原理 上文提到使用@Order或实现SmartApplicationListener接口可以对多个EventListener的执行顺序进行指定,其原理即为@Order注解或Ordered接口决定Bean的执行顺序的原理。
上文提到ApplicationEventMulticaster进行事件推送时,主要逻辑代码如下,进入getApplicationListeners->retrieveApplicationListeners中
1 2 3 4 5 6 7 8 9 10 11 12 13 14 15 16 17 18 19 20 21 22 23 24 25 26 27 28 29 30 31 32 33 34 35 36 public void multicastEvent (final ApplicationEvent event, @Nullable ResolvableType eventType) { ResolvableType type = (eventType != null ? eventType : resolveDefaultEventType(event)); Executor executor = getTaskExecutor(); for (ApplicationListener<?> listener : getApplicationListeners(event, type)) { if (executor != null ) { executor.execute(() -> invokeListener(listener, event)); } else { invokeListener(listener, event); } } } protected Collection<ApplicationListener<?>> getApplicationListeners(ApplicationEvent event, ResolvableType eventType) { ..... return retrieveApplicationListeners(eventType, sourceType, newRetriever); } private Collection<ApplicationListener<?>> retrieveApplicationListeners( ResolvableType eventType, @Nullable Class<?> sourceType, @Nullable CachedListenerRetriever retriever) { List<ApplicationListener<?>> allListeners = new ArrayList <>(); AnnotationAwareOrderComparator.sort(allListeners); return allListeners; }


